Controlling Welding Distortion in Sheet Metal Fabrication
Process Anjue Metal | Process | 11 min read | Updated Oct 8, 2026
A cabinet that closes perfectly in the workshop and jams in the customer's rack is almost always a distortion problem, not a bending problem. Heat shrinks metal as it cools, and welded panels respond by pulling out of flat. The good news: distortion is predictable, and almost all of it can be designed out before a single arc is struck.
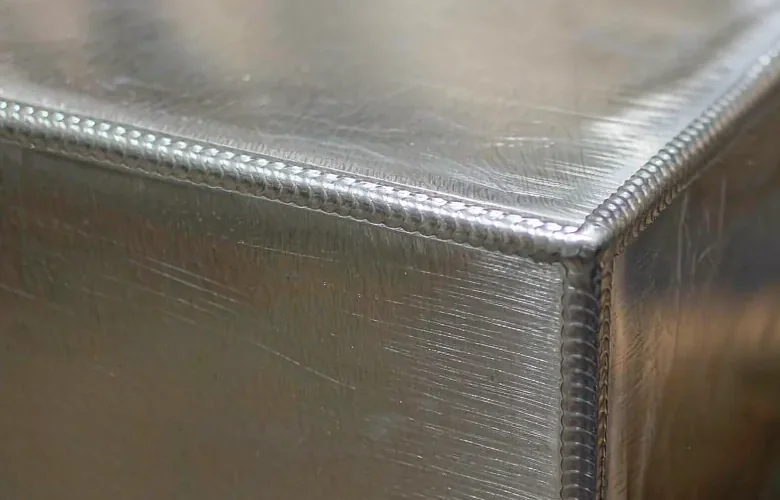
Why Weldments Move
Welding heats a local area to over 1,500 C. As that area cools it contracts, but the surrounding cold metal restrains it. The result is residual stress and permanent movement. Three mechanisms do the damage:
- Longitudinal shrinkage along the weld seam - pulls panels shorter and can bow a long cabinet side.
- Transverse shrinkage across the seam - pulls flanges together, which is what makes door gaps close up.
- Angular distortion - a butt or fillet weld shrinks more at the top of the joint than the bottom, tilting the plate.
Thin sheet is worst affected because it has little stiffness to resist the pull. A 1.5 mm cabinet side with a full-length weld will move several millimetres; a 6 mm base plate with the same weld will barely move.
Design Controls - Decide This Before You Draw
The cheapest distortion control happens on the drawing:
- Weld less. Every centimetre of weld is a centimetre of shrinkage. Ask whether a stitch weld or a spot weld would satisfy the load case. Many cosmetic panels are welded along their full length for no engineering reason.
- Put the weld where it cannot be seen and where movement is harmless. On a cabinet, welding the internal frame rather than the visible outer skin removes the problem entirely.
- Use flanges and returns. A formed flange is dramatically stiffer than a flat sheet and resists pull-in. A design with a 15 mm flange along a welded edge will stay far flatter than a flat edge.
- Design for lap and T-joints with a small throat. Large, deep welds deposit more heat for little extra strength on thin sheet.
- Add a relief slot or a break. Where two panels meet at a corner, a small relief at the end of the bend and a gap at the corner prevents the weld from dragging the adjacent panel out of square.
- Keep symmetry. A weld pattern that is asymmetric on an asymmetric part produces an asymmetric result that is very hard to correct.
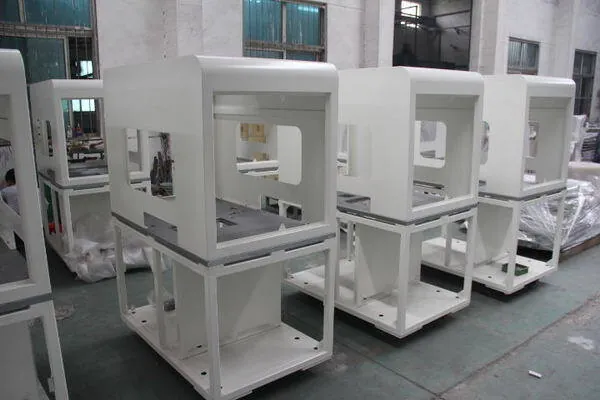
Process Controls - What a Good Workshop Does
These are the techniques that separate a workshop that welds sheet metal from one that welds plate:
- Tack first, all round, then weld. Tacking the full assembly before running any bead locks the geometry and lets the tacks pull evenly instead of one end dragging the other.
- Balanced sequence. Weld opposite sides alternately, moving from the centre outward. Welding one side completely and then the other guarantees a bow.
- Back-step welding. Run short beads backwards along the seam so each new bead starts in already-cooled metal. This limits the accumulation of heat.
- Minimise heat input. Use the lowest current that achieves penetration, travel faster, and avoid weaving. Heat input is a number you can calculate and control, not a matter of feel.
- Heat sinks and copper backing. Copper bars clamped along a weld draw heat away and hold edges straight.
- Let it cool between passes. Sequential hot passes on the same area stack stress. Cool between passes where possible.
- Clamp and fixture properly. A robust fixture holds the part in the correct shape while it cools, so the part freezes in position rather than in a distorted position. Fixtures must be stiff - a weak clamp deflects with the part and does nothing.
Material and Thickness Effects
- Thin gauge (0.8-1.5 mm) distorts most. Consider rivets, clinching, adhesives or spot welding instead of continuous TIG or MIG.
- Stainless steel conducts heat poorly and has a high thermal expansion coefficient, so it distorts more than mild steel at equal heat input.
- Aluminium conducts heat away quickly and expands a lot, so it needs higher travel speed and often a different fixturing approach. Preheating thick aluminium can help; on thin sheet it is usually a speed and sequence problem.
- Galvanized steel introduces coating burn-back and porosity, so welds need cleaning and the local coating needs restoring.
Post-Weld Correction Options
If distortion still happens, there are recovery routes - but they cost money and carry risk:
| Method | What it does | Risk |
|---|---|---|
| Mechanical straightening (press) | Forces the part back into tolerance | Can crack welds or stretch the surface |
| Local heating and quenching | Shrinks the stretched side to pull a panel straight | Leaves visible marks, requires skill |
| Spot heating (flame shrinking) | Corrects localised bulges | High skill requirement, heat tint |
| Re-cutting and re-welding | Last resort | Costs a full rework cycle |
| Grinding flush | Removes visible unevenness | Thins the material, may expose porosity |
| Accept and adjust fit | Tolerate and compensate elsewhere | Transfers the problem to assembly |
A well-run factory plans to avoid correction rather than to perform it. If your supplier routinely straightens parts after welding, ask why the design or the sequence is not being fixed upstream - repeated straightening is also a hidden cost in your price.
What to Inspect, and How
- Flatness - check on a surface plate or against a straight edge while the part is unrestrained.
- Diagonal and squareness - measure across corners; this catches bow and skew early.
- Door and panel gaps - assemble the unit before coating, because finishing will not fix a gap.
- Dimensional check after cooling - never measure a hot weldment, it has not finished moving.
- Photograph the assembly stage - the clearest way to prove to a customer that a fit issue was solved.
We inspect welded geometry before surface finishing, because coating hides nothing and reveals everything.
Note · If you have a weldment that has to stay flat, tell the supplier the flatness requirement as a number - for example "flat within 1 mm over 1000 mm, unrestrained". A flatness requirement that is never stated is never inspected.
Frequently Asked Questions
Localised heating and the contraction that follows as the metal cools, restrained by colder surrounding metal. Weld length, heat input and weld sequence are the three biggest variables.
Use the minimum weld consistent with strength - often stitch or spot welds rather than full seams - tack the whole assembly before welding, use a balanced sequence from the centre outward, reduce heat input, and fixture the part in a stiff clamp or jig while it cools.
Yes. Stainless has higher thermal expansion and lower thermal conductivity, so heat concentrates in the weld zone and produces more movement at the same heat input.
Sometimes, by mechanical straightening or localised heat shrinking. Both are skilled, costly and carry risk of cracking or cosmetic marking, so preventing distortion through design and sequence is always the better route.
Yes - welded assemblies are built in fixtures and clamped in position while cooling. For critical flatness or squareness requirements, fixture design is reviewed together with the drawing before production starts.
Explore Related Capabilities
- Electrical Enclosures & Cabinets — Welded steel cabinets and enclosures
- Stainless Steel Fabrication — TIG-welded stainless panels and parts
Have a Drawing to Quote?
Send STEP, DXF or PDF drawings and we reply with engineering feedback and a detailed quotation within 24 hours on working days.